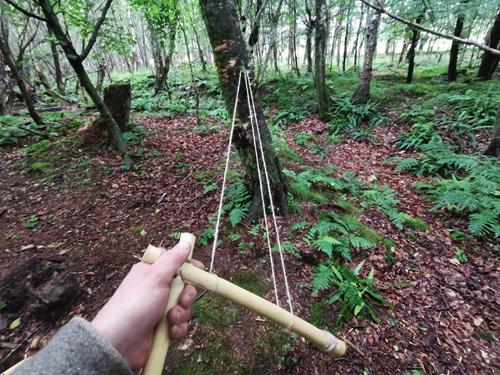
Cordage craft is a vital skill in bushcraft, allowing you to create essential tools and supports from natural materials. Whether you need rope for building shelters, setting traps, or various other tasks, knowing how to make cordage from materials found in the wild can significantly enhance your survival capabilities. Mastering this craft not only improves your resourcefulness but also deepens your understanding of the natural environment.
The Importance of Cordage Craft
Creating your own rope and string from natural materials is a valuable skill that enhances your self-reliance and flexibility in the wild. Cordage can be used for a multitude of purposes, from constructing shelters to securing gear and creating tools. Understanding the basics of cordage craft helps you utilize the resources around you effectively. For more detailed information and practical tips on cordage and other bushcraft techniques, our bushcraft blog offers a wealth of knowledge to help you develop your skills.
Key Techniques for Making Cordage
1. Selecting Natural Materials
Choosing the right materials is crucial for effective cordage:
- Plant Fibers: Common materials include the inner bark of trees (such as cedar or basswood), grasses, and weeds. These fibers should be strong, flexible, and easily stripped or separated.
- Animal Materials: In some survival situations, you can use animal sinew or hide strips for making cordage. These materials are durable and strong but require additional processing.
2. Preparing the Fibers
Proper preparation of fibers ensures strong and effective cordage:
- Soaking: Some plant fibers need to be soaked in water to make them more pliable and easier to work with. Soak them until they become soft and flexible.
- Stripping and Separating: Strip the outer bark or outer layers from the plant materials and separate the inner fibers. For grasses, simply cut and remove the leaves to expose the strands.
3. Splicing and Twisting Techniques
There are several methods for creating cordage, each with its own techniques:
- Twisting: Take several fibers and twist them together in one direction. As you twist, the fibers will naturally start to bind together. This method is suitable for making basic ropes and strings.
- Braiding: For stronger and more durable cordage, braid multiple strands of fiber together. Braiding involves crossing and intertwining the fibers to create a thicker, more robust rope.
- Splicing: Join two lengths of cordage by intertwining their ends. Splicing creates a continuous length of cordage and is useful for repairing or extending your ropes.
4. Creating Different Types of Cordage
Depending on your needs, you can create various types of cordage:
- String: For lighter tasks, use thinner fibers and a simple twisting technique to make string. This is ideal for tying small items or making lightweight tools.
- Rope: For heavier tasks, such as building shelters or hauling objects, use thicker fibers and braiding techniques to create strong, durable rope.
5. Testing and Using Your Cordage
Ensure your cordage is reliable before using it:
- Strength Test: Test the strength of your cordage by applying gradual pressure. Make sure it can hold the intended weight or stress without breaking.
- Applications: Use your cordage for various tasks such as securing shelter materials, creating traps, or making gear. Properly crafted cordage can be a versatile tool in your bushcraft toolkit.
Conclusion
Cordage craft is an essential skill that enhances your ability to survive and thrive in the wilderness. By learning how to make rope and string from natural materials, you gain the flexibility to adapt to various situations and needs. For more detailed guidance on cordage techniques and other bushcraft skills, our bushcraft blog provides comprehensive resources to support your outdoor adventures.


